
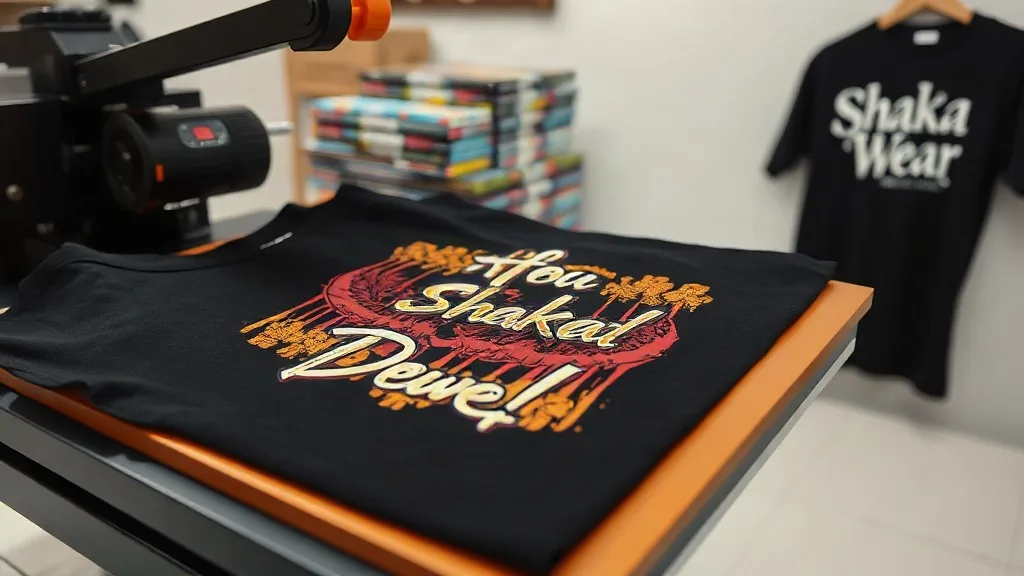
Custom apparel has never been more accessible. Whether you're a small business owner, a creative hobbyist, or someone looking to launch a clothing line, the options for decorating garments have expanded dramatically. Among the most talked-about methods today are dtf transfers, a technology that bridges the gap between professional printing and at-home production. In this guide, we'll walk through what DTF is, how it works, and why pairing it with quality blanks like shaka wear can elevate your finished products.
What Are DTF Transfers?
DTF stands for Direct-to-Film. It's a printing method where your design is printed onto a special film, then coated with a powder adhesive and cured. The resulting transfer can be applied to fabric using a heat press. Unlike DTG (Direct-to-Garment) printing, which requires the garment to be loaded into a printer, dtf transfers are produced separately and then applied. This makes them incredibly versatile: you can print a batch of transfers and apply them to different items as needed, from t-shirts to tote bags.
The process involves several steps: designing your artwork, printing it onto the film, applying adhesive powder, curing the powder, and finally heat-pressing the transfer onto the fabric. Each step requires attention to detail, but the learning curve is manageable. Many small businesses and hobbyists have adopted dtf transfers because they offer a low barrier to entry compared to other methods like screen printing, which requires setup costs and minimum order quantities.
Why Choose DTF Transfers?
There are several compelling reasons to consider DTF for your custom apparel projects. First, it works on a wide range of fabrics, including cotton, polyester, blends, and even some synthetics. This flexibility is a major advantage over methods like sublimation, which only works on light-colored polyester. Second, DTF transfers can reproduce intricate designs with fine details and gradients without the color limitations of screen printing. You can print full-color images with photographic quality.
Another benefit is durability. When applied correctly, DTF transfers are known for their wash resistance and stretchability. They adhere well to the fabric and can withstand repeated washing without cracking or fading prematurely. This makes them suitable for items that will see regular use, such as workwear or promotional apparel. Finally, DTF is cost-effective for short runs. You don't need to invest in screens or plates, and you can order as few as one transfer, making it ideal for sampling or one-off custom pieces.
Pairing DTF with Shaka Wear Blanks
The quality of your finished product depends not only on the printing method but also on the garment itself. Shaka Wear is a brand known for its heavyweight, durable blanks that cater to streetwear and everyday wear. Their t-shirts, hoodies, and crewnecks are made from thick cotton fabrics that provide a substantial feel and a relaxed fit. When you apply dtf transfers to Shaka Wear garments, you get a combination of a premium blank and a vibrant, long-lasting print.
Shaka Wear's blanks are particularly popular among those who appreciate a boxy, oversized silhouette. The fabric weight (often 6.5 oz or heavier) holds up well to the heat press and provides a smooth surface for the transfer to adhere to. The tight knit of the fabric minimizes texture show-through, allowing the printed design to appear crisp and detailed. If you're looking to create apparel that feels both comfortable and high-quality, starting with a Shaka Wear blank is a smart move.
How to Apply DTF Transfers: A Step-by-Step Guide
Applying DTF transfers is straightforward if you follow the right steps. Here's a general process that works for most fabrics. Note that specific settings may vary depending on your heat press and transfer supplier, so always test first.
- Preheat your heat press. Set the temperature to around 300-325°F (150-160°C) for cotton fabrics. For polyester, you may need to lower the temperature slightly to avoid scorching.
- Pre-press the garment. Place the garment on the press and press for 5-10 seconds to remove moisture and wrinkles. This ensures a smooth surface for the transfer.
- Position the transfer. Place the DTF transfer on the garment with the printed side facing up. The adhesive side should be in contact with the fabric.
- Press. Apply medium to firm pressure for 10-15 seconds. Use a pressing pillow or folded towel inside the garment to ensure even pressure if needed.
- Peel. Wait a few seconds for the transfer to cool slightly, then peel the film away smoothly. For a matte finish, you can do a second press with a cover sheet for 5 seconds.
After pressing, inspect the edges to ensure the transfer is fully adhered. If any corners lift, re-press for a few seconds. Allow the garment to cool completely before folding or wearing.
Common Mistakes to Avoid
Even with a simple process, there are pitfalls that can affect the outcome. One common mistake is insufficient pressure. If the press isn't applying enough force, the transfer won't bond properly, leading to peeling after washing. Another is overheating, which can cause the adhesive to scorch or the film to stick to the press. Always use a Teflon sheet or parchment paper between the press and the transfer to protect both. Additionally, avoid stretching the garment while it's hot, as this can distort the design. Finally, make sure your transfer is completely dry before pressing; any moisture can create bubbles or weak spots.
DTF vs. Other Printing Methods
How does DTF compare to screen printing, DTG, and vinyl? Screen printing is cost-effective for large orders but requires setup and is limited in color complexity. DTG is great for detailed designs on cotton but can be expensive per item and may not work well on dark colors without a pretreatment. Vinyl is durable but limited to simple shapes and single colors. DTF sits in a sweet spot: it handles complex designs, works on many fabrics, and is affordable for short runs. It's not perfect for every situation, but for many creators, it's the most flexible option.
Getting Started with DTF Transfers
If you're ready to dive into DTF, you'll need a few essentials: a heat press, a supply of DTF transfers, and garments to press onto. When choosing a heat press, look for one with consistent temperature and pressure. For transfers, you can order custom prints from suppliers or invest in a DTF printer if you plan to produce high volumes. Many beginners start by ordering transfers online and pressing them at home or in a small studio. As you gain experience, you can expand your offerings and experiment with different fabrics and designs.
Frequently Asked Questions
How long do DTF transfers last on a shirt?
With proper application and care, DTF transfers can last as long as the garment itself. They are resistant to cracking and fading, but washing inside out in cold water and avoiding high heat in the dryer will help prolong their life.
Can I use DTF transfers on dark-colored shirts?
Yes, DTF transfers work well on dark fabrics because the white ink layer in the transfer provides a base for the colors to pop. This is a major advantage over some other methods.
Do I need a special printer for DTF?
To create your own transfers, you need a DTF printer and a curing oven or heat gun. However, many people buy pre-printed transfers from suppliers and simply apply them with a heat press, which is more cost-effective for small-scale production.
What is the best fabric for DTF transfers?
DTF transfers adhere well to cotton, polyester, and blends. For best results, use fabrics with a smooth surface. Shaka Wear's heavyweight cotton blanks are an excellent choice for durable, high-quality prints.
How do I wash a shirt with a DTF transfer?
Turn the garment inside out and machine wash in cold water with mild detergent. Avoid bleach and fabric softeners. Tumble dry on low or hang dry. Do not iron directly on the transfer.